4. PM4NGS on GCP instance with Ubuntu
4.1. Creating a GCP instance with Ubuntu 20.02 LTS
Creates a VM instance running Ubuntu
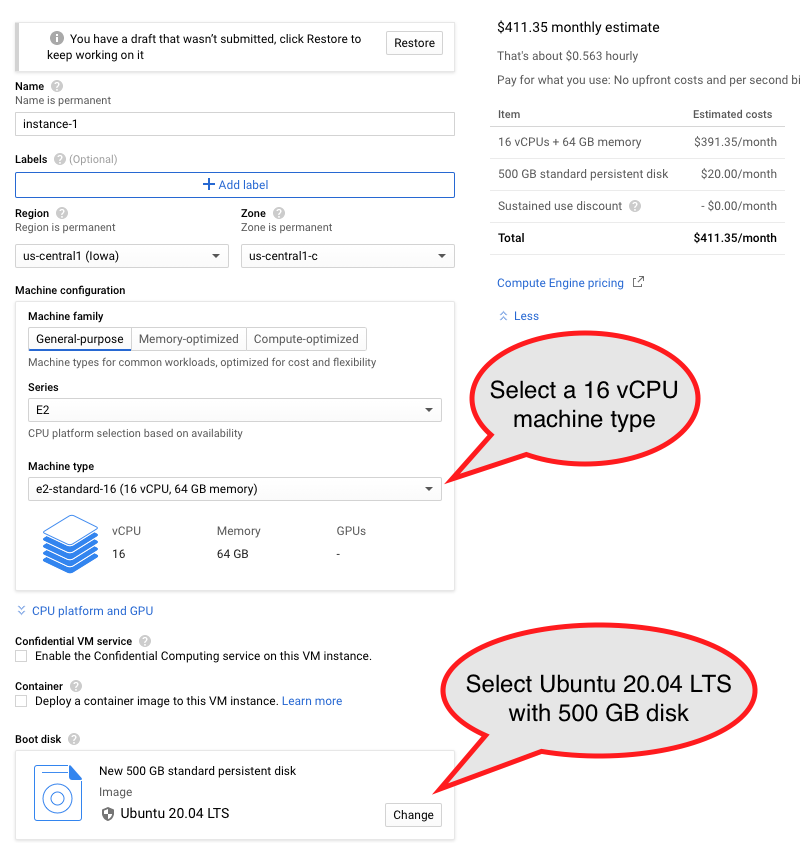
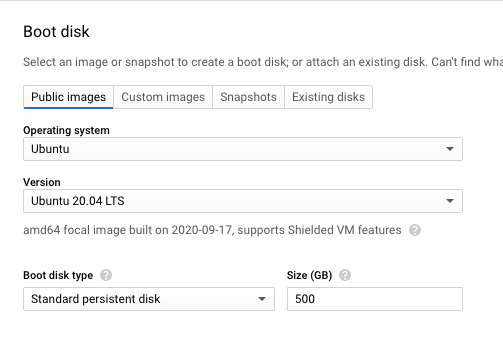
Select boot disk with Ubuntu 20.04 LTS with 500 GB of standard persistent disk.
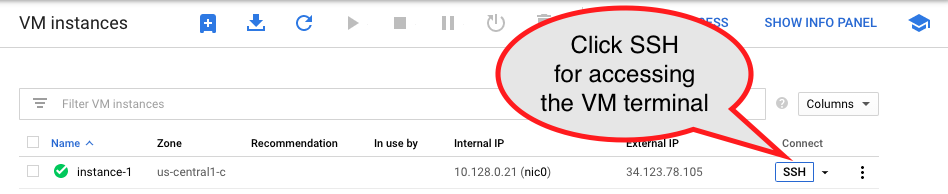
Click on the SSH button for accessing the instance
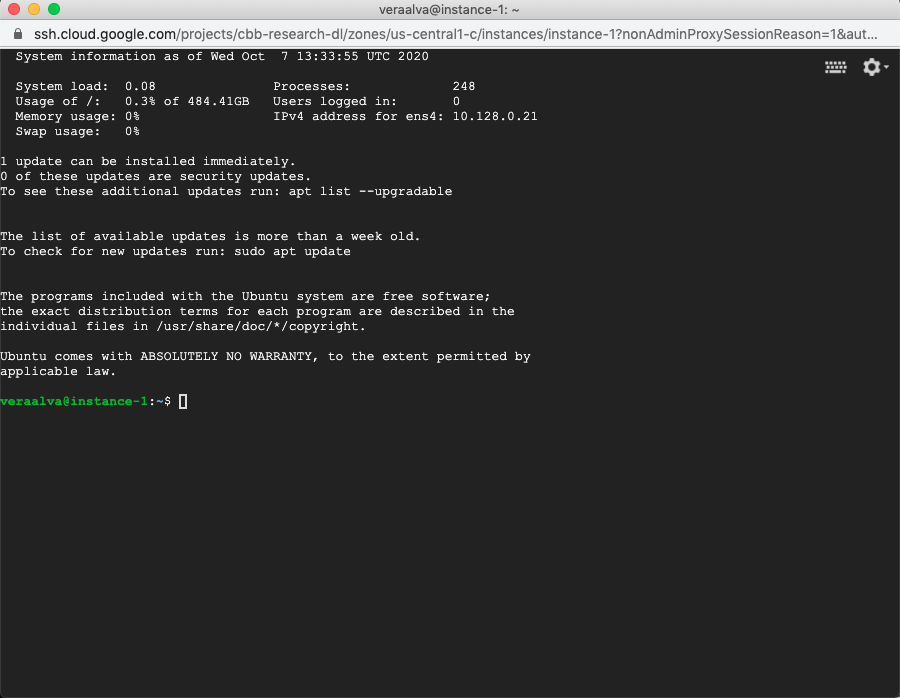
A terminal is available after accessing through SSH
4.2. Installing PM4NGS on the GCP instance with Ubuntu
Runs these commands on a terminal to prepare the instance to run PM4NGS
veraalva@instance-1:~$ sudo apt-get update
veraalva@instance-1:~$ sudo apt-get install docker.io python3 python3-pip python3-venv python3-dev poppler-utils gcc nodejs tree
veraalva@instance-1:~$ sudo usermod -aG docker $USER
veraalva@instance-1:~$ logout
Close and reopen the terminal to set the docker group in the user. Then, click on the SSH button again to re-launch the terminal.
4.3. Installing PM4NGS
Creates a Python virtual environment named: pm4ngs_venv for installing PM4NGS
veraalva@instance-1:~$ python3 -m venv pm4ngs_venv
veraalva@instance-1:~$ source pm4ngs_venv/bin/activate
(pm4ngs_venv) veraalva@instance-1:~$ pip install wheel
(pm4ngs_venv) veraalva@instance-1:~$ pip install pm4ngs
4.4. Using PM4NGS
Open a terminal and activate the pm4ngs_venv virtual environment
veraalva@instance-1:~$ source pm4ngs_venv/bin/activate
(pm4ngs_venv) veraalva@instance-1:~$ pm4ngs-chipexo --version
PM4NGS version: 0.0.4
(pm4ngs_venv) veraalva@instance-1:~$
4.5. Running the ChIP-exo demo
Open a terminal and activate the pm4ngs_venv virtual environment
veraalva@instance-1:~$ source pm4ngs_venv/bin/activate
(pm4ngs_venv) veraalva@perseo:~$ pm4ngs-chipexo-demo
Generating demo for ChIP-exo data analysis project
Downloading file: pm4ngs_chipexo_demo_config.yaml
Downloading file: pm4ngs_chipexo_demo_sample_data.csv
Using config file: pm4ngs_chipexo_demo_config.yaml
{
    "author_name": "Roberto Vera Alvarez",
    "user_email": "veraalva@ncbi.nlm.nih.gov",
    "project_name": "pm4ngs-chipexo",
    "dataset_name": "PRJNA338159",
    "is_data_in_SRA": "y",
    "sequencing_technology": "single-end",
    "create_demo": "n",
    "number_spots": "1000000",
    "organism": "Escherichia coli",
    "genome_name": "NC_000913.3",
    "genome_dir": "{{ cookiecutter.genome_name}}",
    "aligner_index_dir": "{{ cookiecutter.genome_dir}}/BWA/",
    "genome_fasta": "{{ cookiecutter.genome_dir}}/NC_000913.3.fa",
    "genome_gtf": "{{ cookiecutter.genome_dir}}/NC_000913.3.gtf",
    "genome_chromsizes": "{{ cookiecutter.genome_dir}}/NC_000913.3.sizes",
    "use_docker": "y",
    "max_number_threads": "32"
}
Cloning Git repo: https://github.com/ncbi/cwl-ngs-workflows-cbb to /home/veraalva/pm4ngs-chipexo/bin/cwl
Updating CWLs dockerPull and SoftwareRequirement from: /home/veraalva/pm4ngs-chipexo/requirements/conda-env-dependencies.yaml
bamscale with version 0.0.3 update image to: quay.io/biocontainers/bamscale:0.0.3--ha85820d_0
    /Users/veraalva/my_ngs_project/bin/cwl/tools/bamscale/bamscale-docker.yml with old image replaced: quay.io/biocontainers/bamscale:0.0.5--h18f8b1d_1
bedtools with version 2.29.2 update image to: quay.io/biocontainers/bedtools:2.29.2--hc088bd4_0
    /Users/veraalva/my_ngs_project/bin/cwl/tools/bedtools/bedtools-docker.yml with old image replaced: quay.io/biocontainers/bedtools:2.28.0--hdf88d34_0
bioconductor-diffbind with version 2.16.0 update image to: quay.io/biocontainers/bioconductor-diffbind:2.16.0--r40h5f743cb_0
    /Users/veraalva/my_ngs_project/bin/cwl/tools/R/deseq2-pca.cwl with old image replaced: quay.io/biocontainers/bioconductor-diffbind:2.16.0--r40h5f743cb_2
    /Users/veraalva/my_ngs_project/bin/cwl/tools/R/macs-cutoff.cwl with old image replaced: quay.io/biocontainers/bioconductor-diffbind:2.16.0--r40h5f743cb_2
    /Users/veraalva/my_ngs_project/bin/cwl/tools/R/dga_heatmaps.cwl with old image replaced: quay.io/biocontainers/bioconductor-diffbind:2.16.0--r40h5f743cb_2
    /Users/veraalva/my_ngs_project/bin/cwl/tools/R/diffbind.cwl with old image replaced: quay.io/biocontainers/bioconductor-diffbind:2.16.0--r40h5f743cb_2
    /Users/veraalva/my_ngs_project/bin/cwl/tools/R/edgeR-2conditions.cwl with old image replaced: quay.io/biocontainers/bioconductor-diffbind:2.16.0--r40h5f743cb_2
    /Users/veraalva/my_ngs_project/bin/cwl/tools/R/volcano_plot.cwl with old image replaced: quay.io/biocontainers/bioconductor-diffbind:2.16.0--r40h5f743cb_2
    /Users/veraalva/my_ngs_project/bin/cwl/tools/R/readQC.cwl with old image replaced: quay.io/biocontainers/bioconductor-diffbind:2.16.0--r40h5f743cb_2
    /Users/veraalva/my_ngs_project/bin/cwl/tools/R/deseq2-2conditions.cwl with old image replaced: quay.io/biocontainers/bioconductor-diffbind:2.16.0--r40h5f743cb_2
bwa with version 0.7.17 update image to: quay.io/biocontainers/bwa:0.7.17--hed695b0_7
    /Users/veraalva/my_ngs_project/bin/cwl/tools/bwa/bwa-docker.yml with old image replaced: quay.io/biocontainers/bwa:0.7.17--h84994c4_5
There is not biocontainer image for gffread version 0.12.1
homer with version 4.11 update image to: quay.io/biocontainers/homer:4.11--pl526h9a982cc_2
    /Users/veraalva/my_ngs_project/bin/cwl/tools/homer/homer-docker.yml with old image replaced: quay.io/biocontainers/homer:4.11--pl526h2bce143_2
mace with version 1.2 update image to: quay.io/biocontainers/mace:1.2--py27h99da42f_0
    /Users/veraalva/my_ngs_project/bin/cwl/tools/mace/mace-docker.yml with old image replaced: quay.io/biocontainers/mace:1.2--py27h99da42f_1
meme with version 5.1.1 update image to: quay.io/biocontainers/meme:5.1.1--py37pl526h072abfd_3
    /Users/veraalva/my_ngs_project/bin/cwl/tools/meme/meme-docker.yml with old image replaced: quay.io/biocontainers/meme:5.1.1--py27pl526h53063a7_3
Copying file /Users/veraalva/Work/Developer/Python/pm4ngs/pm4ngs-chipexo/example/pm4ngs_chipexo_demo_sample_data.csv  to /Users/veraalva/my_ngs_project/data/my_dataset_name/sample_table.csv
6 files loaded
Using table:
  sample_name file                     condition  replicate
0  SRR4011416        Exp_O2_growth_no_rifampicin          1
1  SRR4011417        Exp_O2_growth_no_rifampicin          2
2  SRR4011421           Exp_O2_growth_rifampicin          1
3  SRR4011425           Exp_O2_growth_rifampicin          2
4  SRR4011418       Stat_02_growth_no_rifampicin          1
5  SRR4011419       Stat_02_growth_no_rifampicin          2
 Done
The terminal will looks like the next image.
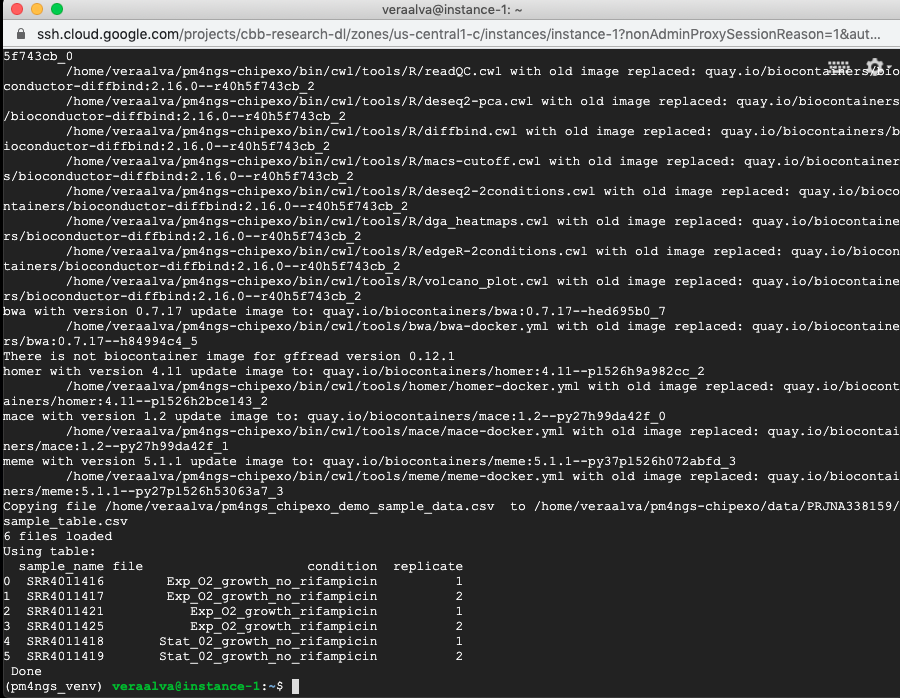
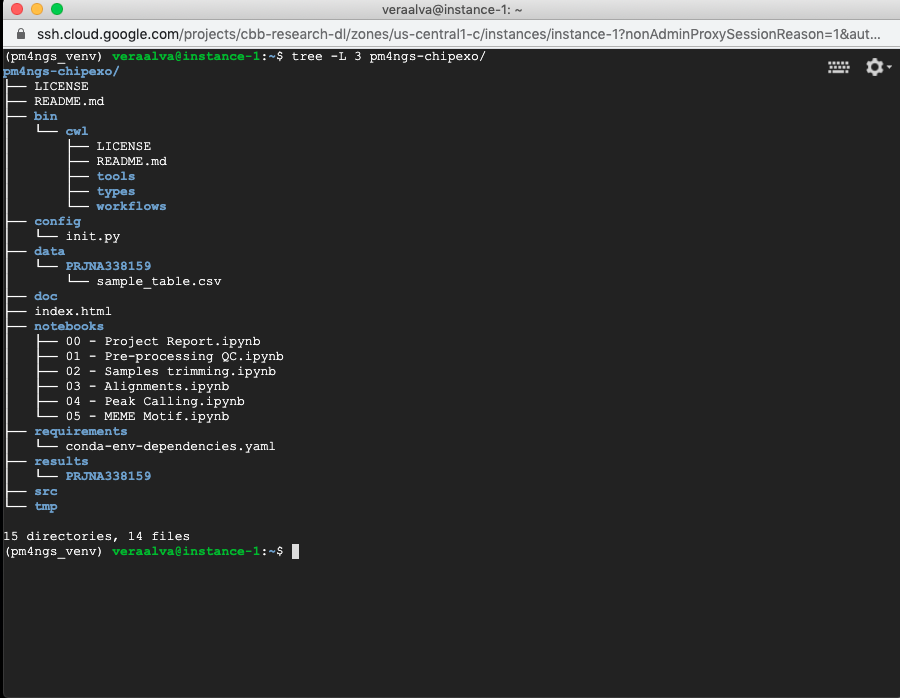
Running the command tree to show the project structure
(pm4ngs_venv) veraalva@instance-1:~$ tree -L 3 pm4ngs-chipexo/
4.6. Running the Jupyter Server
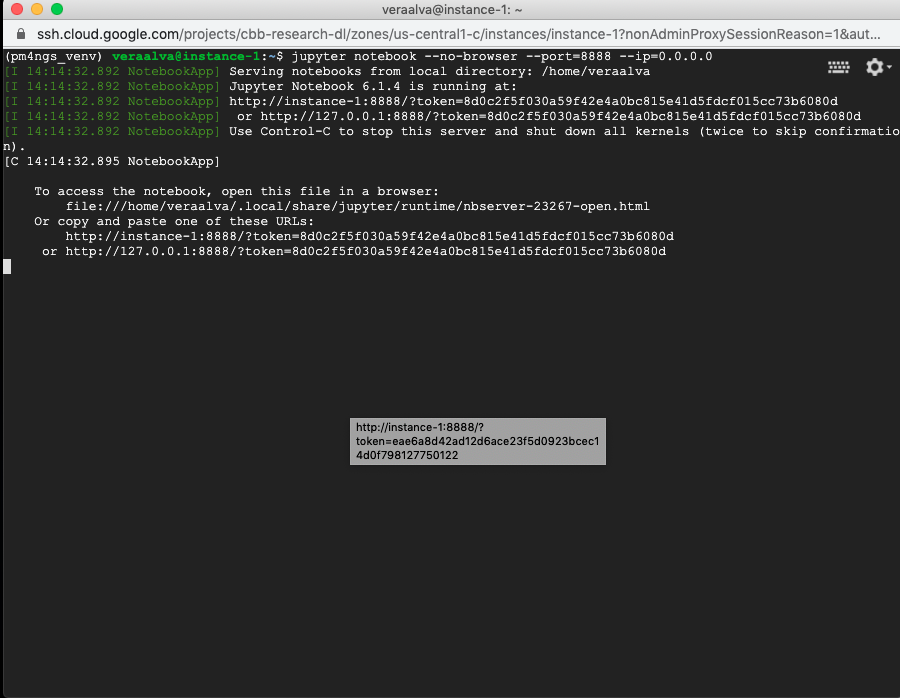
Open a terminal and activate the pm4ngs_venv virtual environment and run the jupyter server. As the GCP instance is a remote computer, we need to run the jupyter server with the --port and --ip options.
(pm4ngs_venv) veraalva@instance-1:~$ jupyter notebook --no-browser --port=8888 --ip=0.0.0.0
[I 14:12:52.956 NotebookApp] Serving notebooks from local directory: /home/veraalva
[I 14:12:52.956 NotebookApp] Jupyter Notebook 6.1.4 is running at:
[I 14:12:52.956 NotebookApp] http://instance-1:8888/?token=eae6a8d42ad12d6ace23f5d0923bcec14d0f798127750122
[I 14:12:52.956 NotebookApp]  or http://127.0.0.1:8888/?token=eae6a8d42ad12d6ace23f5d0923bcec14d0f798127750122
[I 14:12:52.956 NotebookApp] Use Control-C to stop this server and shut down all kernels (twice to skip confirmatio
n).
[C 14:12:52.959 NotebookApp]

    To access the notebook, open this file in a browser:
        file:///home/veraalva/.local/share/jupyter/runtime/nbserver-23251-open.html
    Or copy and paste one of these URLs:
        http://instance-1:8888/?token=eae6a8d42ad12d6ace23f5d0923bcec14d0f798127750122
     or http://127.0.0.1:8888/?token=eae6a8d42ad12d6ace23f5d0923bcec14d0f798127750122
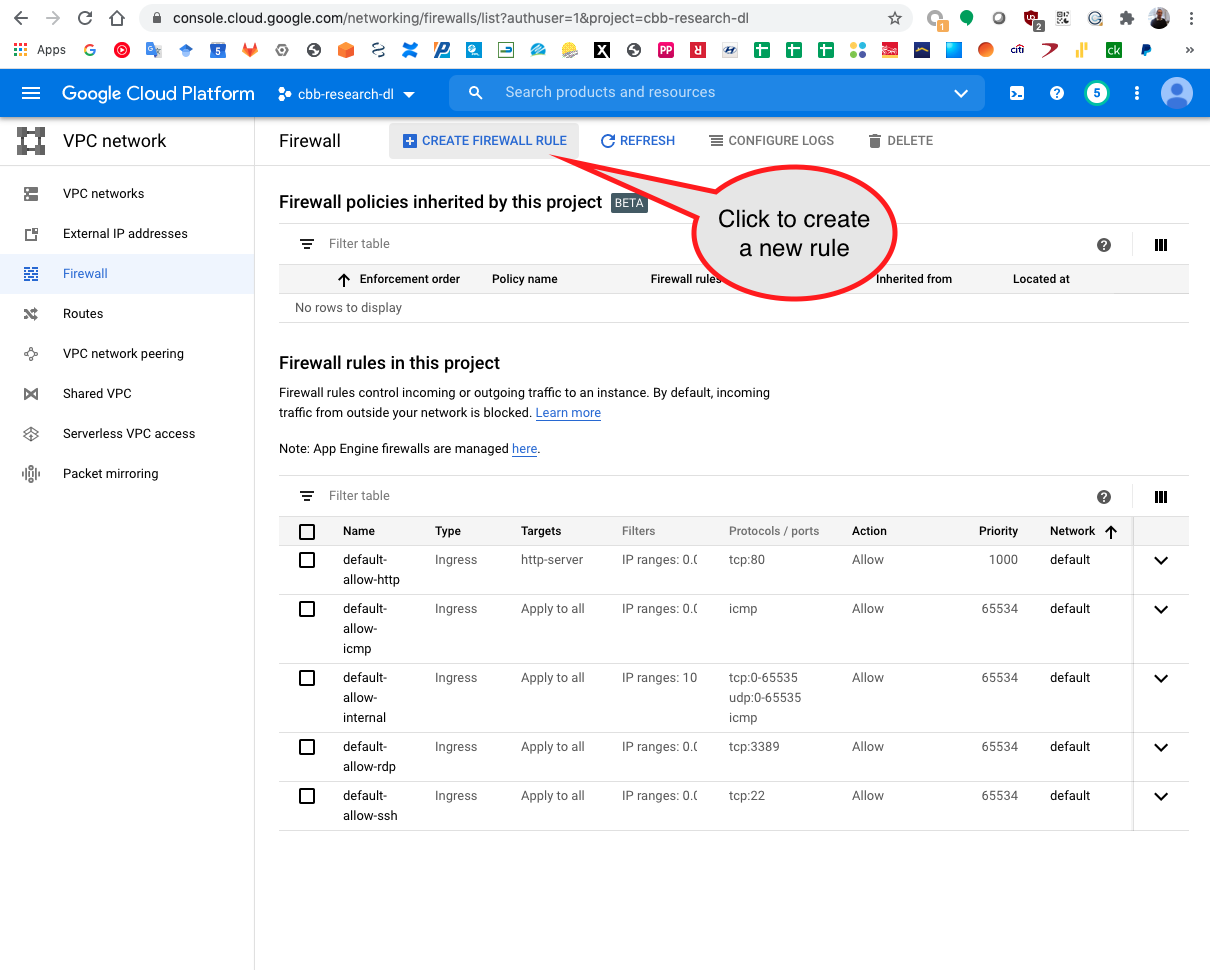
4.7. Open a firewall rule for accessing the Jupyter Server
A GCP firewall rule should be created to access the Jupyter server remotely. From your desktop computer.
Search for Firewall in the GCP search bar.
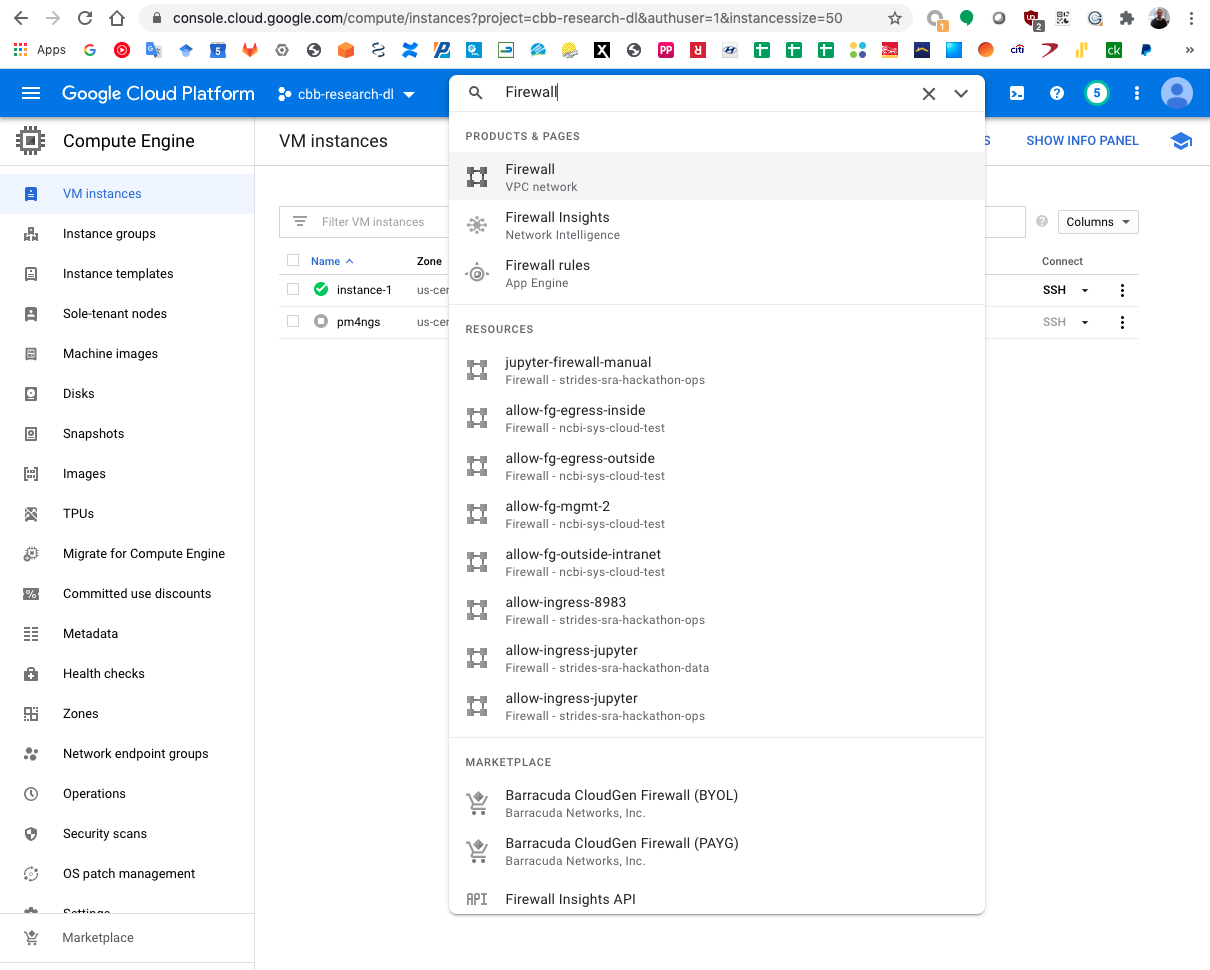
Click on the Create Firewall Rule button.
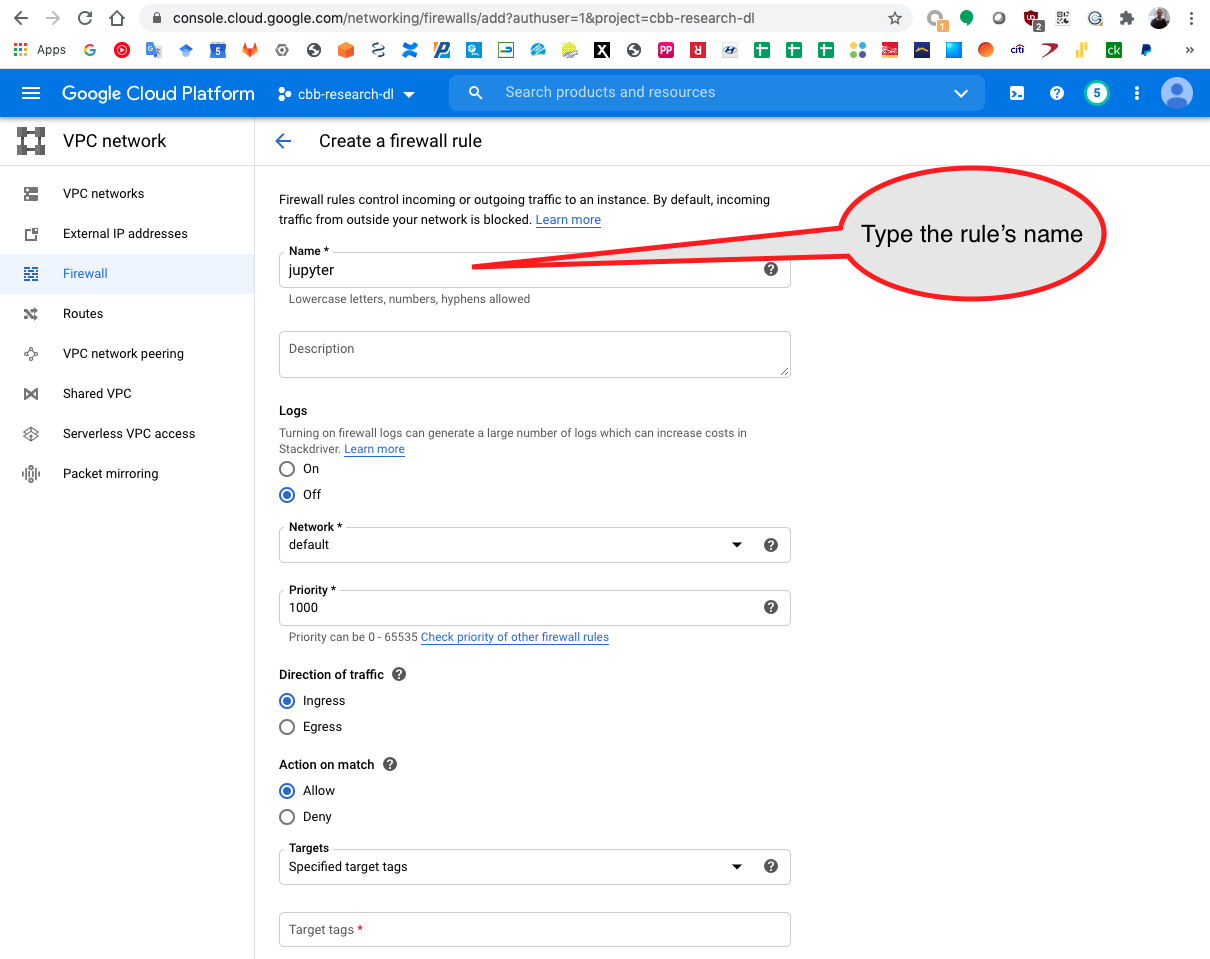
Add the rules name
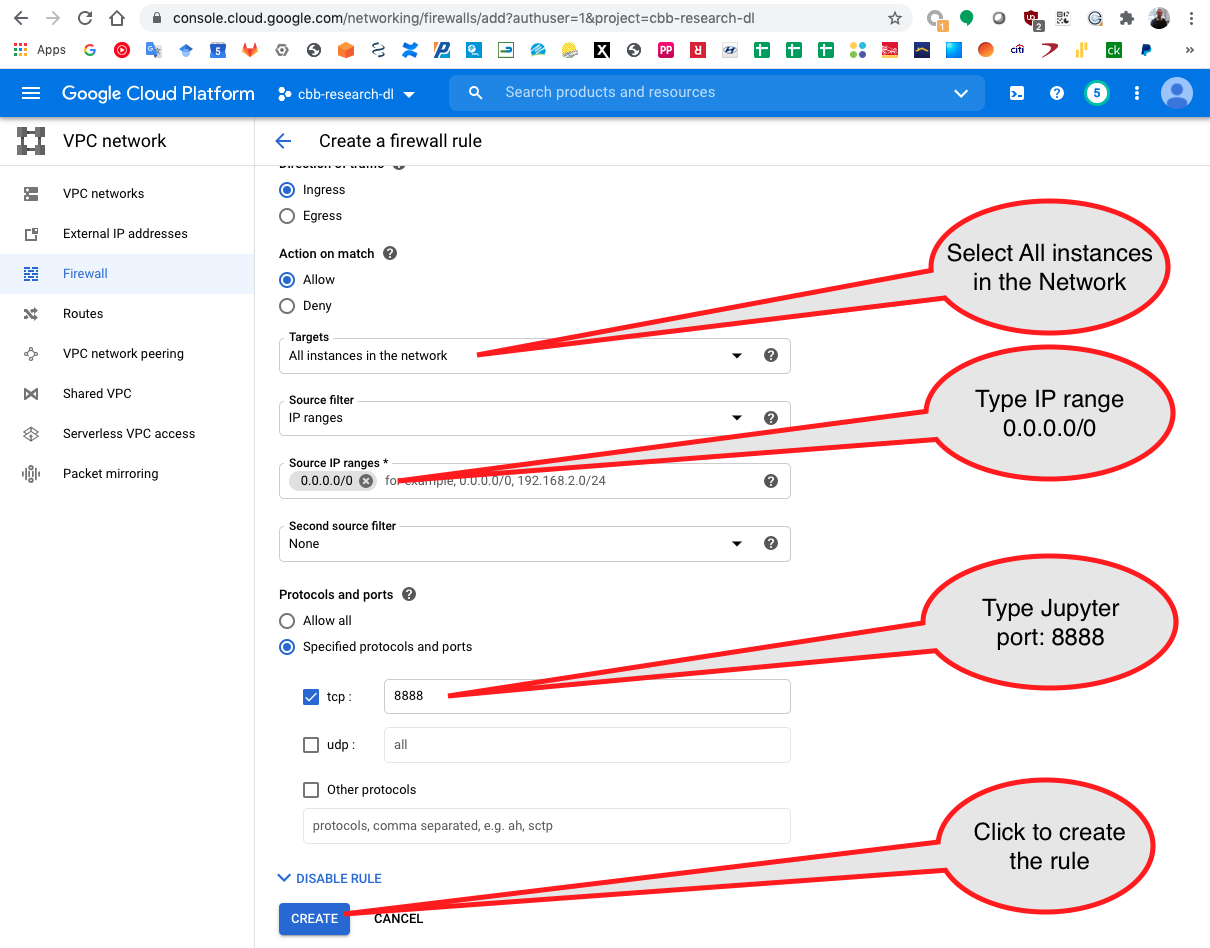
Add the Jupyter port used that is 8888 and click on create.
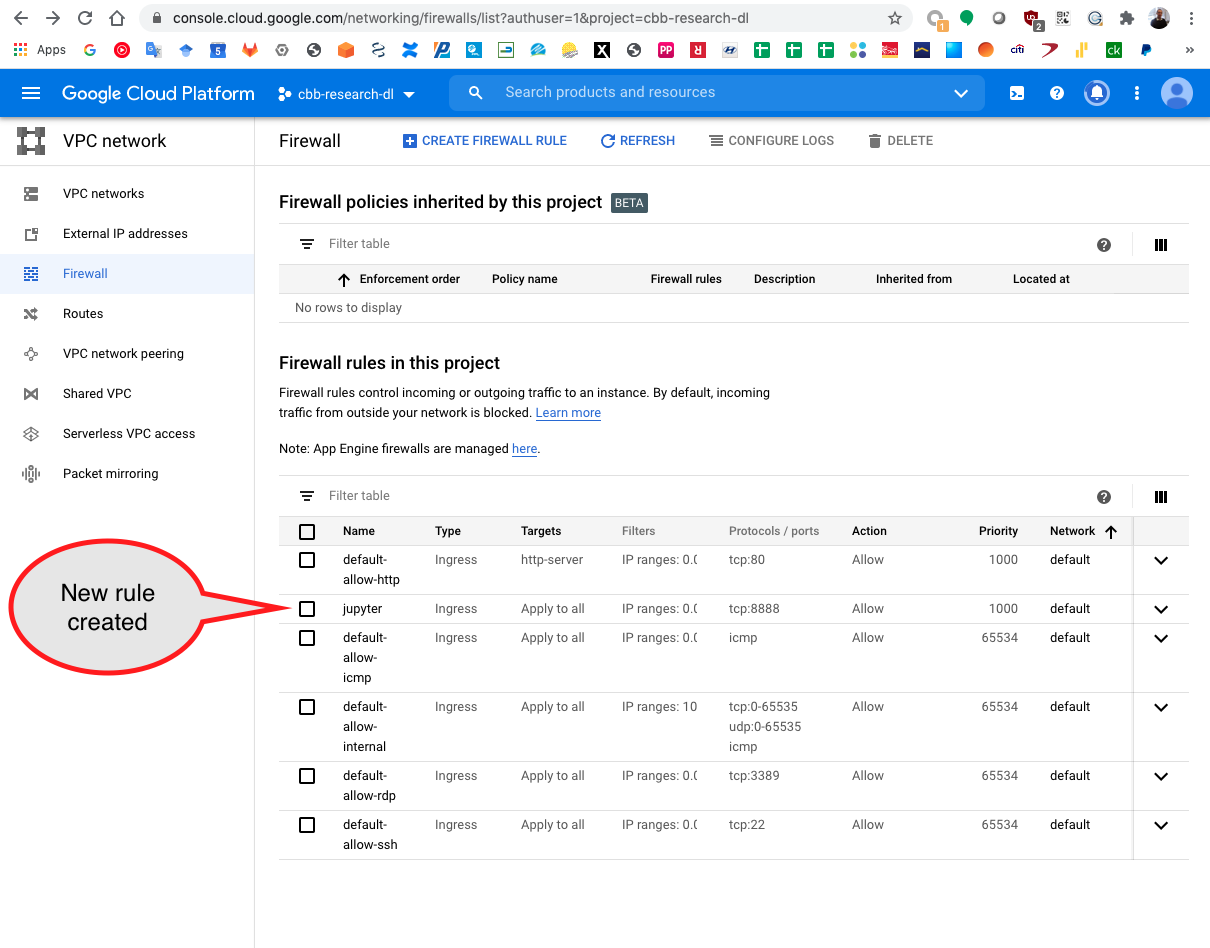
The new rule is created and available
Go back to the VM instances to copy the instance public IP

Copy the instance public IP to the clipboard

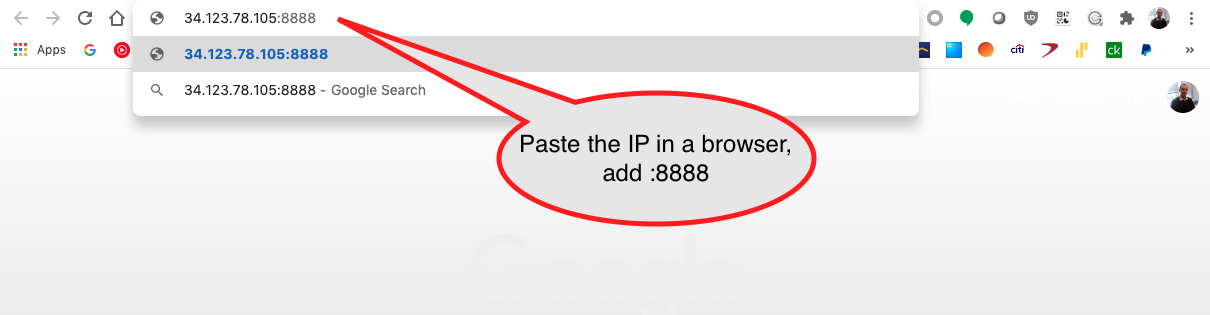
Copy the URL with localhost in a browser adding :8888 which is the Jupyter server port.
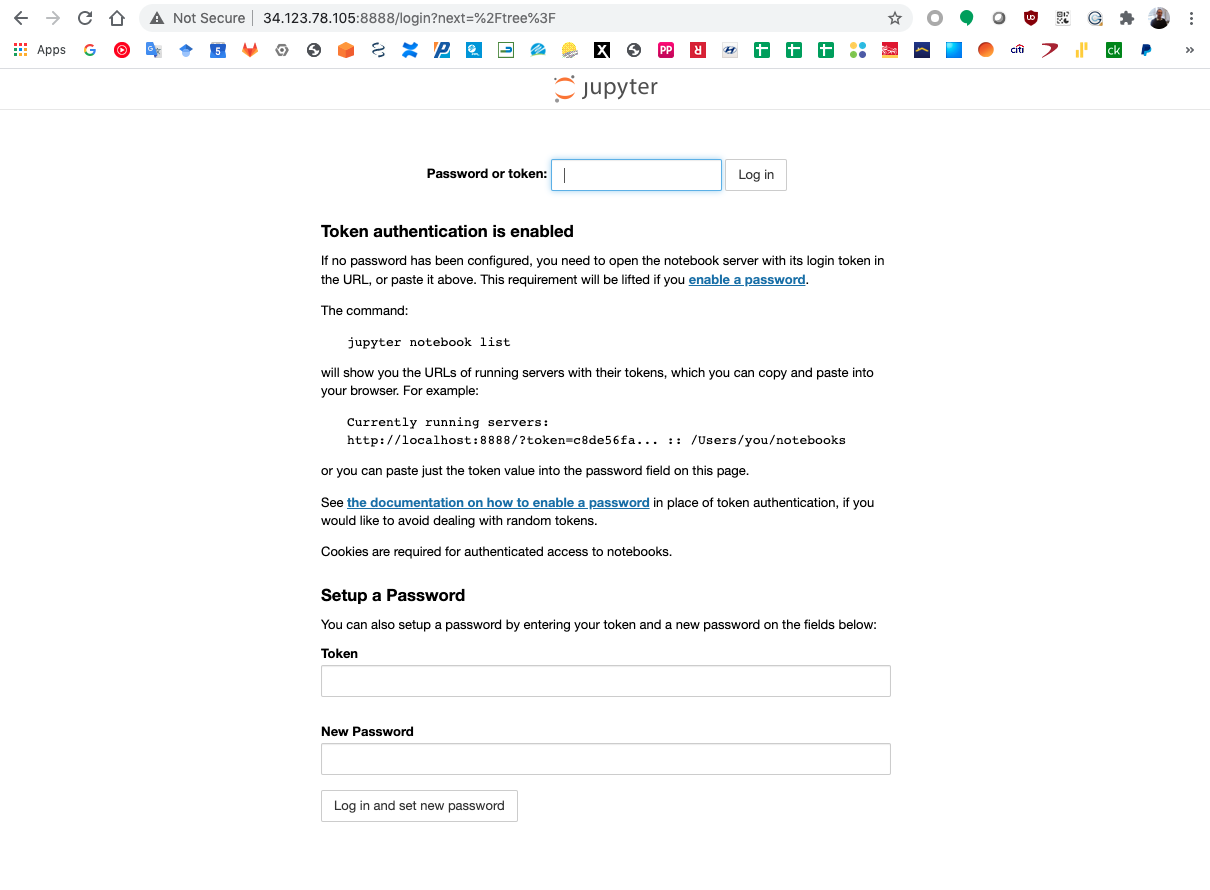
The Jupyter server uses a securoty token to secure the access to your notebooks.
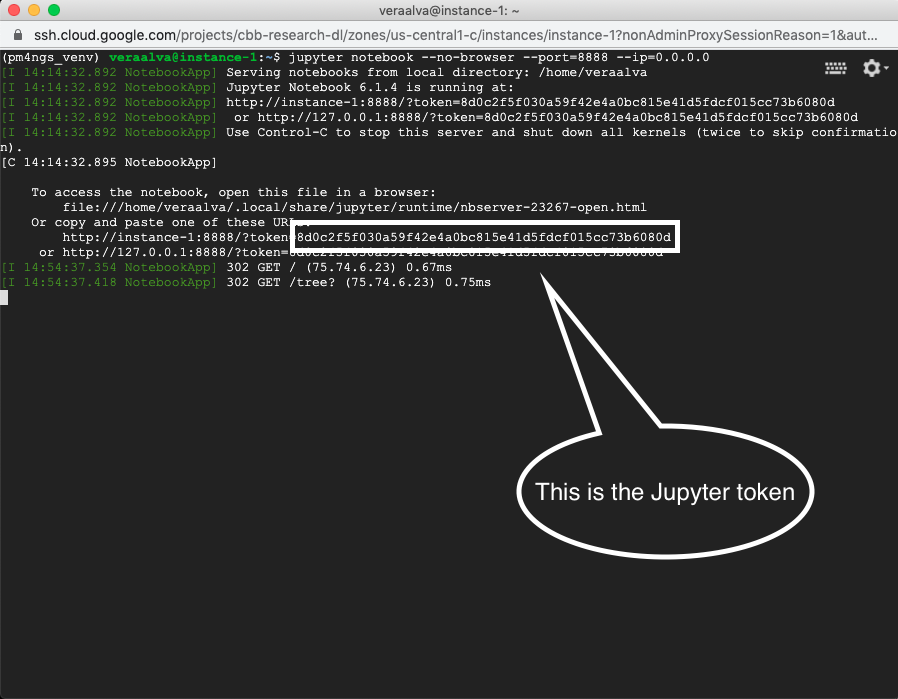
Go to the SSH terminal and copy the Jupyter token.
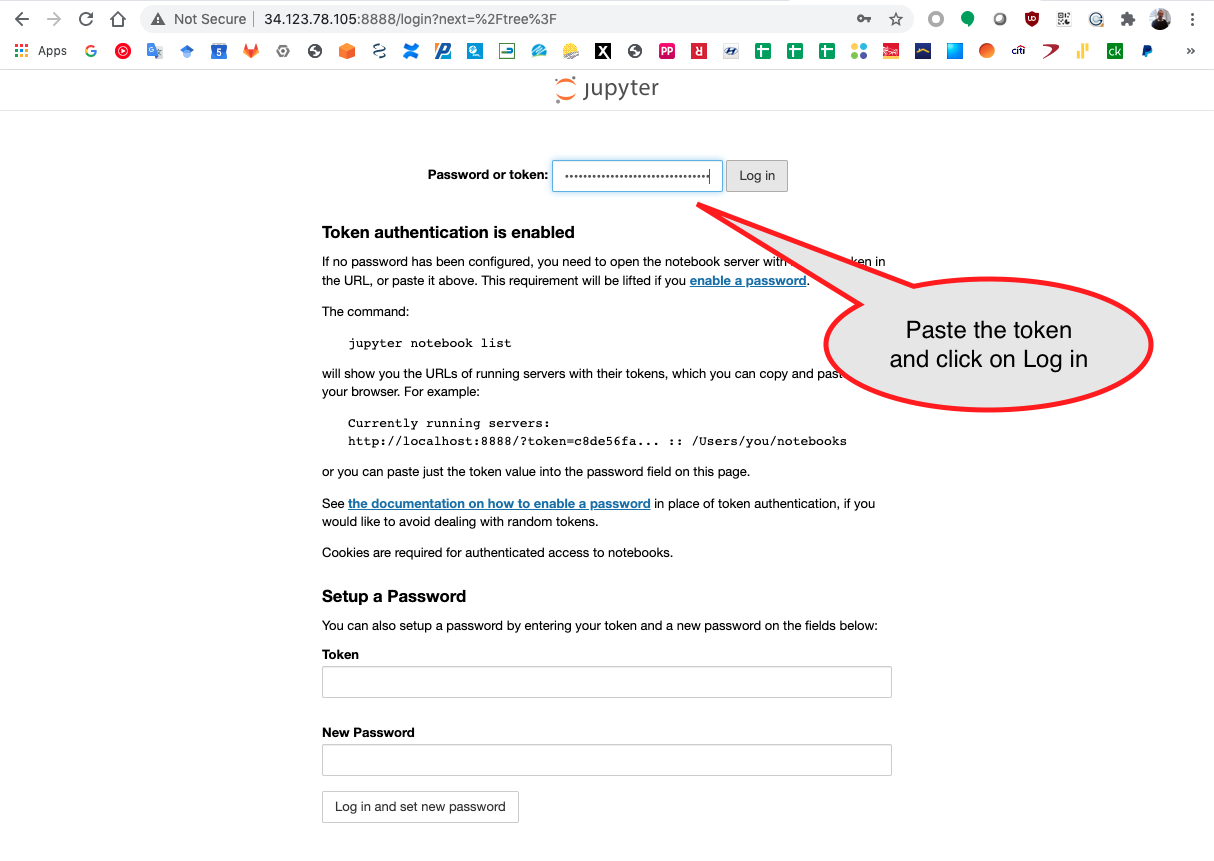
Paste the token in the input bar and click Log in
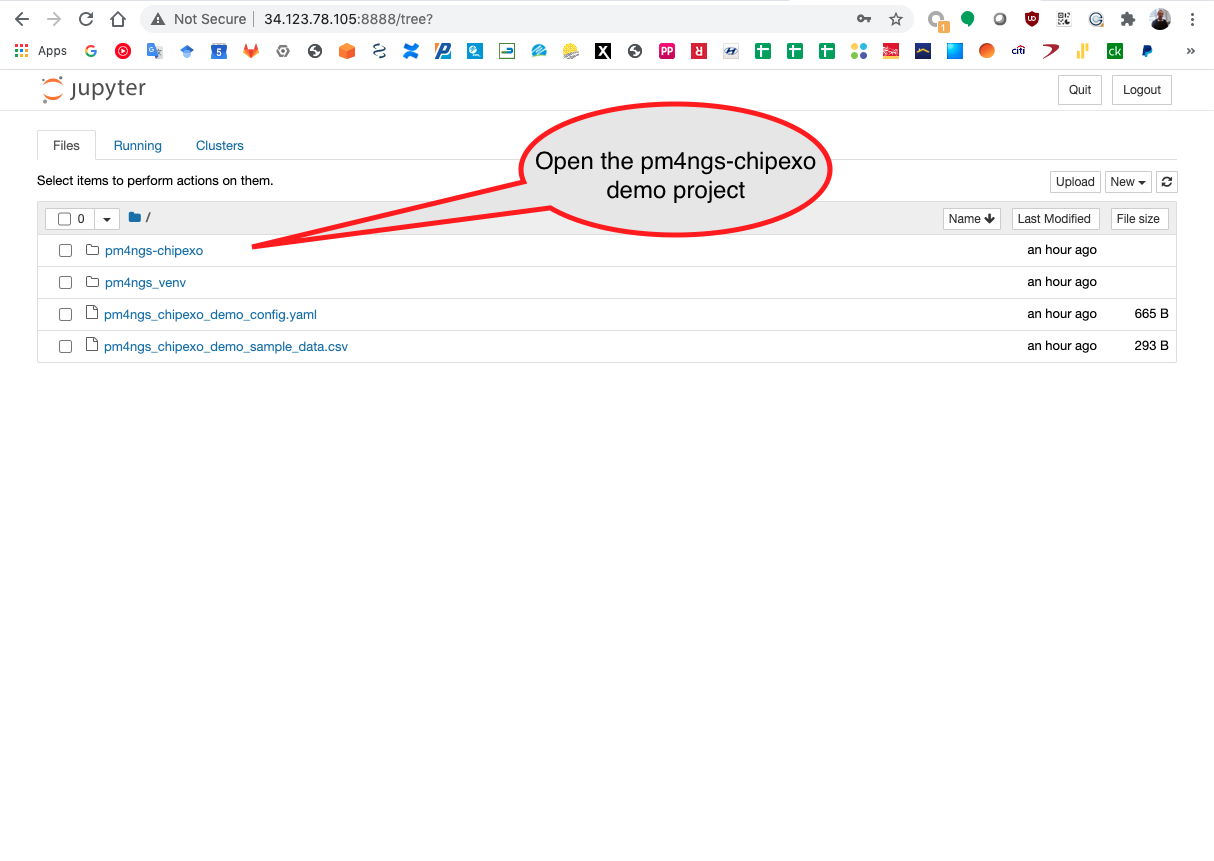
Open the pm4ngs-chipexo directory
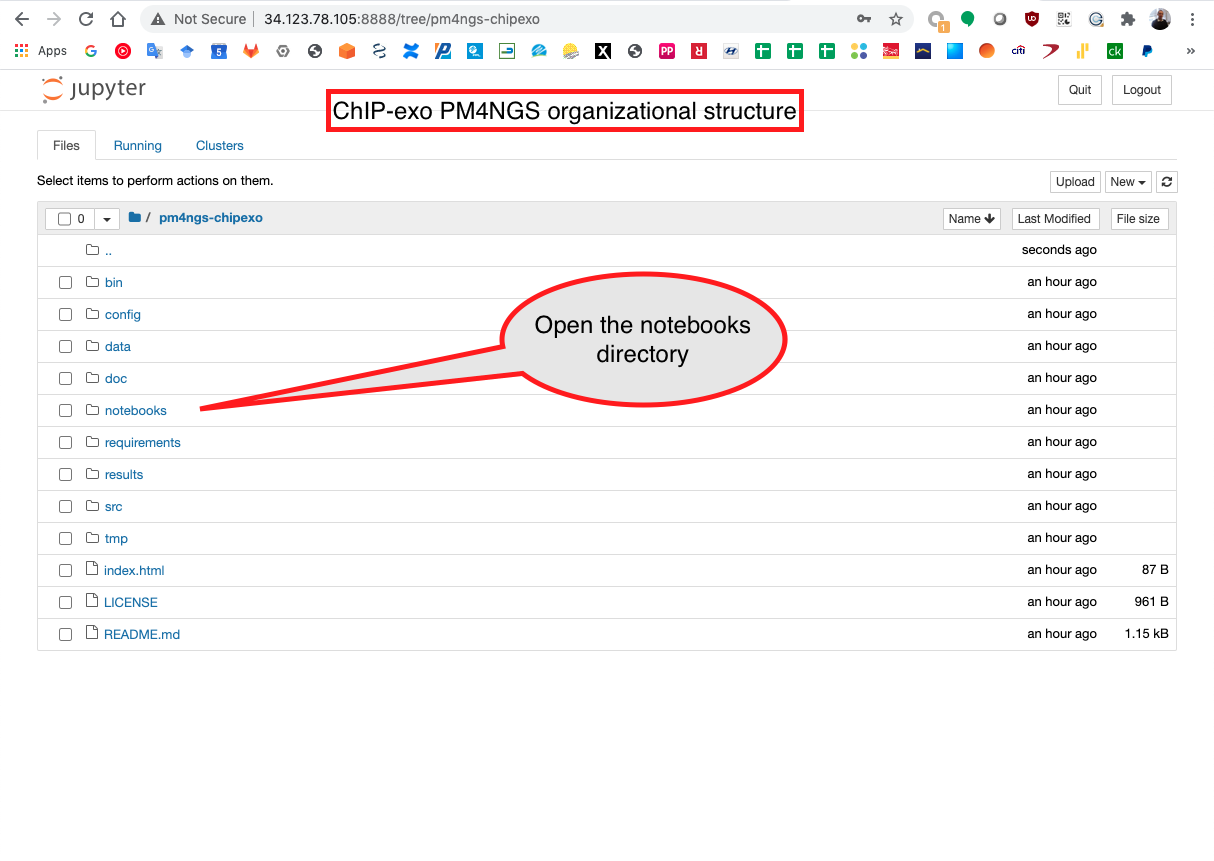
Then, open the notebooks directory
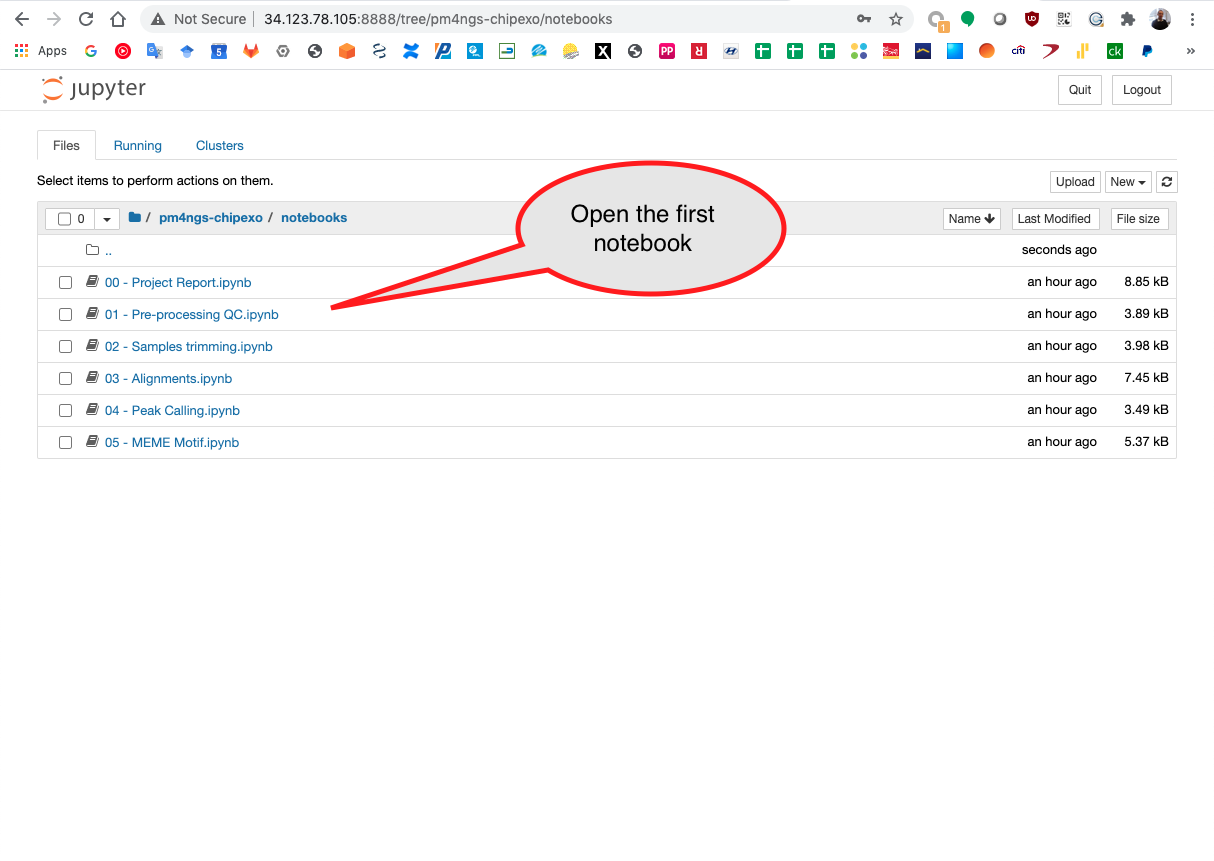
Start running the notebook 01 - Pre-processing QC.ipynb
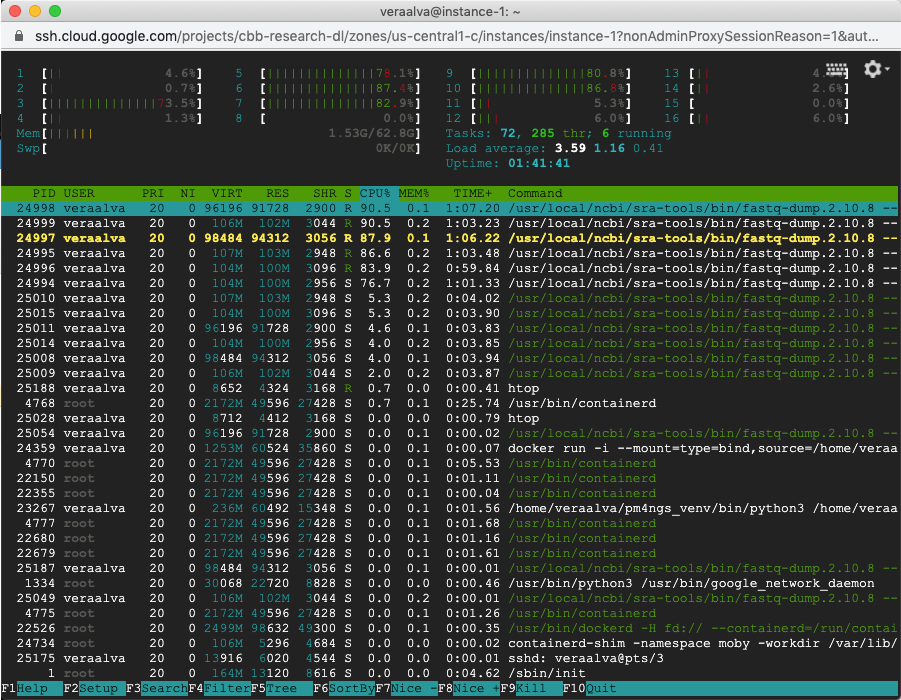
Open a different VM terminal to run the command htop to see the process running. In this casewe are seeing multiple fastq-dump command being executed.
Wait for that process to finish. The log can be checked running the Checking command output cell

In the VM terminal you can use the command tail to see the process log
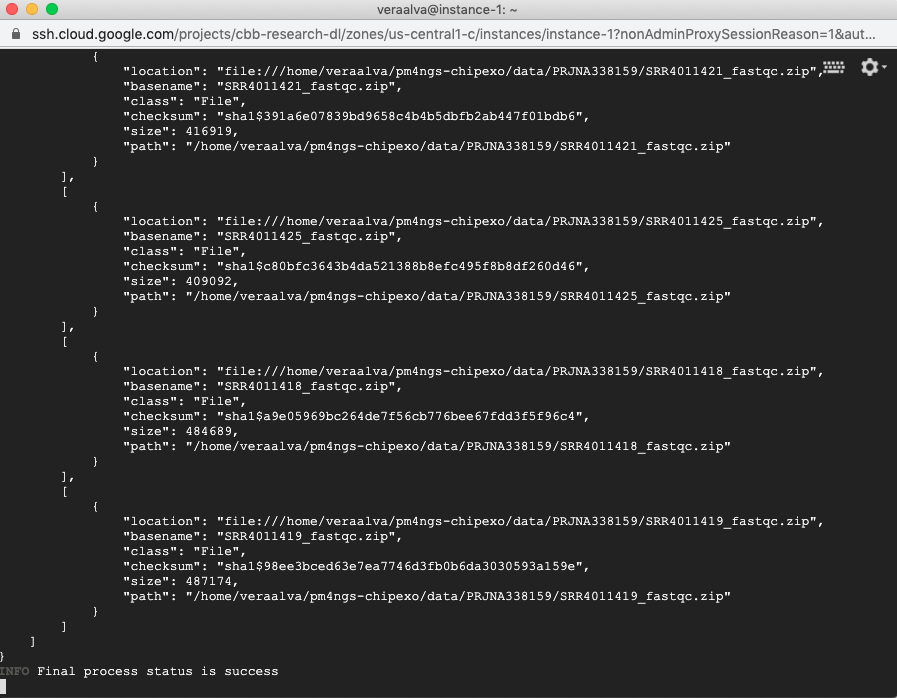
(pm4ngs_venv) veraalva@instance-1:~$ tail -f -n 40 pm4ngs-chipexo/data/PRJNA338159/download.log

The process will finish with a message: Final process status is success
Running the Checking command output cell again

Finish the 01 - Pre-processing QC.ipynb notebook and go to the project report 00 - Project Report.ipynb. Execute the first and second cell to visualize the Pre-processing report table.
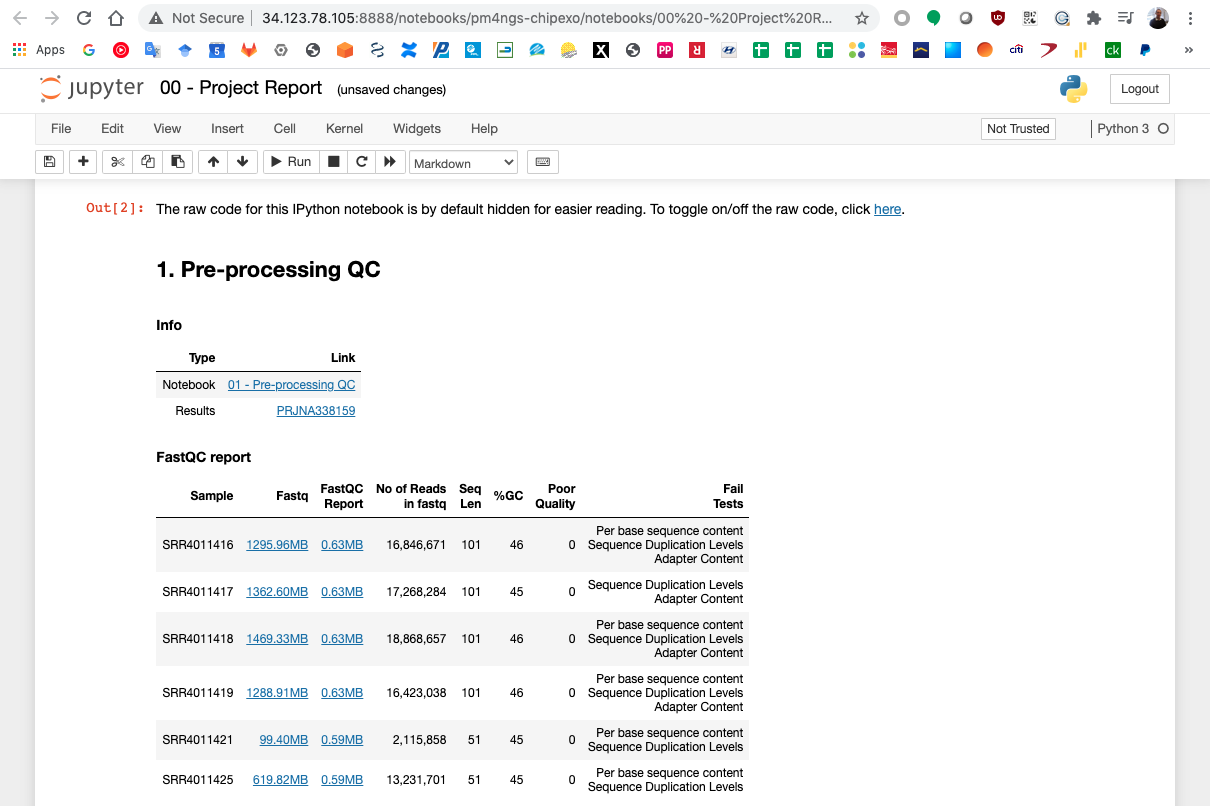
Follow this procedure for each notebook in the project.